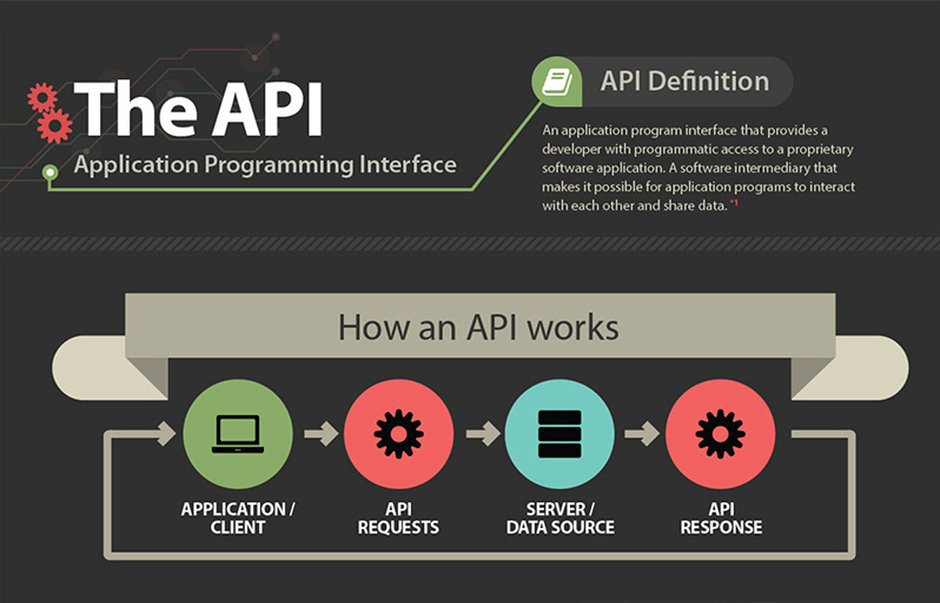
Interface and Application Programming
Assignments
Write an application that interfaces with an input &/or output device that you made
compare as many tool options as possible
Introduction
In this week we need to develop an Application that interface our Input or Output devices.I felt some difficulties for making programmed application and user-interface.
MIT APP INVENTOR

App Inventor for Android is an open-source web application originally provided by Google, and now maintained by the Massachusetts Institute of Technology (MIT).App Inventor lets you develop applications for Android phones using a web browser and either a connected phone or emulator.
App inventor have two part
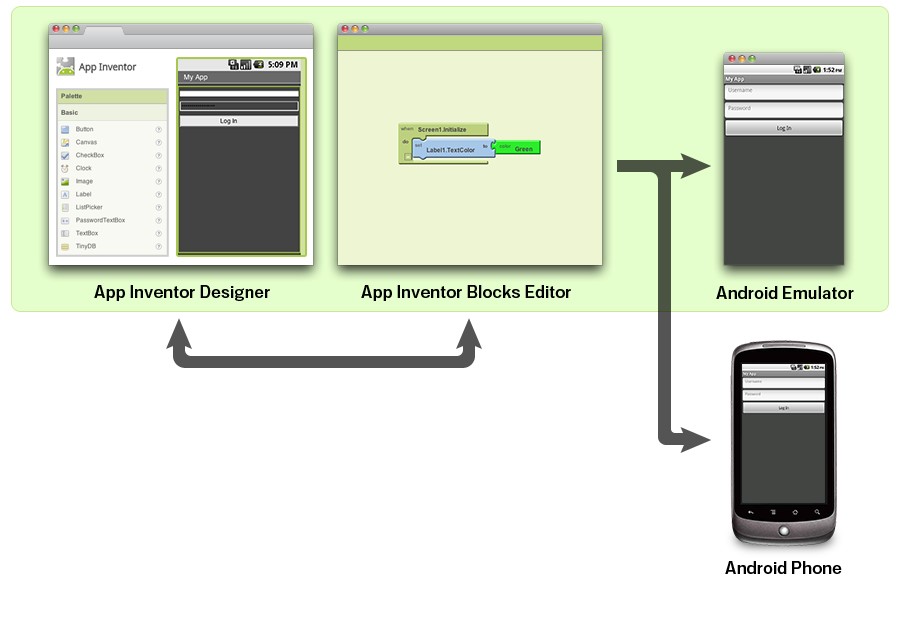
The App Inventor Designer, where you select the components for your app.
The App Inventor Blocks Editor, where you assemble program blocks that specify how the components should behave.
You assemble programs visually, fitting pieces together like pieces of a puzzle.
Your app appears on the phone step-by-step as you add pieces to it, so you can test your work as you build. When you're done, you can package your app and produce a stand-alone application to install.
Here we are going to control LED light by using our phone , for this we need an Application so we are using MIT App inventor.
The App Inventor development environment is supported for Mac OS X, GNU/Linux, and Windows operating systems, and several popular Android phone models. Applications created with App Inventor can be installed on any Android phone.
Before we use App Inventor, we need to set up our computer and install the App Inventor Setup package on our computer.
APPLICATION DEVELOPMENT
UI Design

The App Inventor Components are located on the left hand side of the Designer Window under the title Palette. Components are the basic elements you use to make apps on the Android phone.
I added three Buttonsfor RGB LED , and One Listpicker for selecting the bluetooth device.Also we need to add the Bluetooth Clinet it avilable under the Connectivity tab.
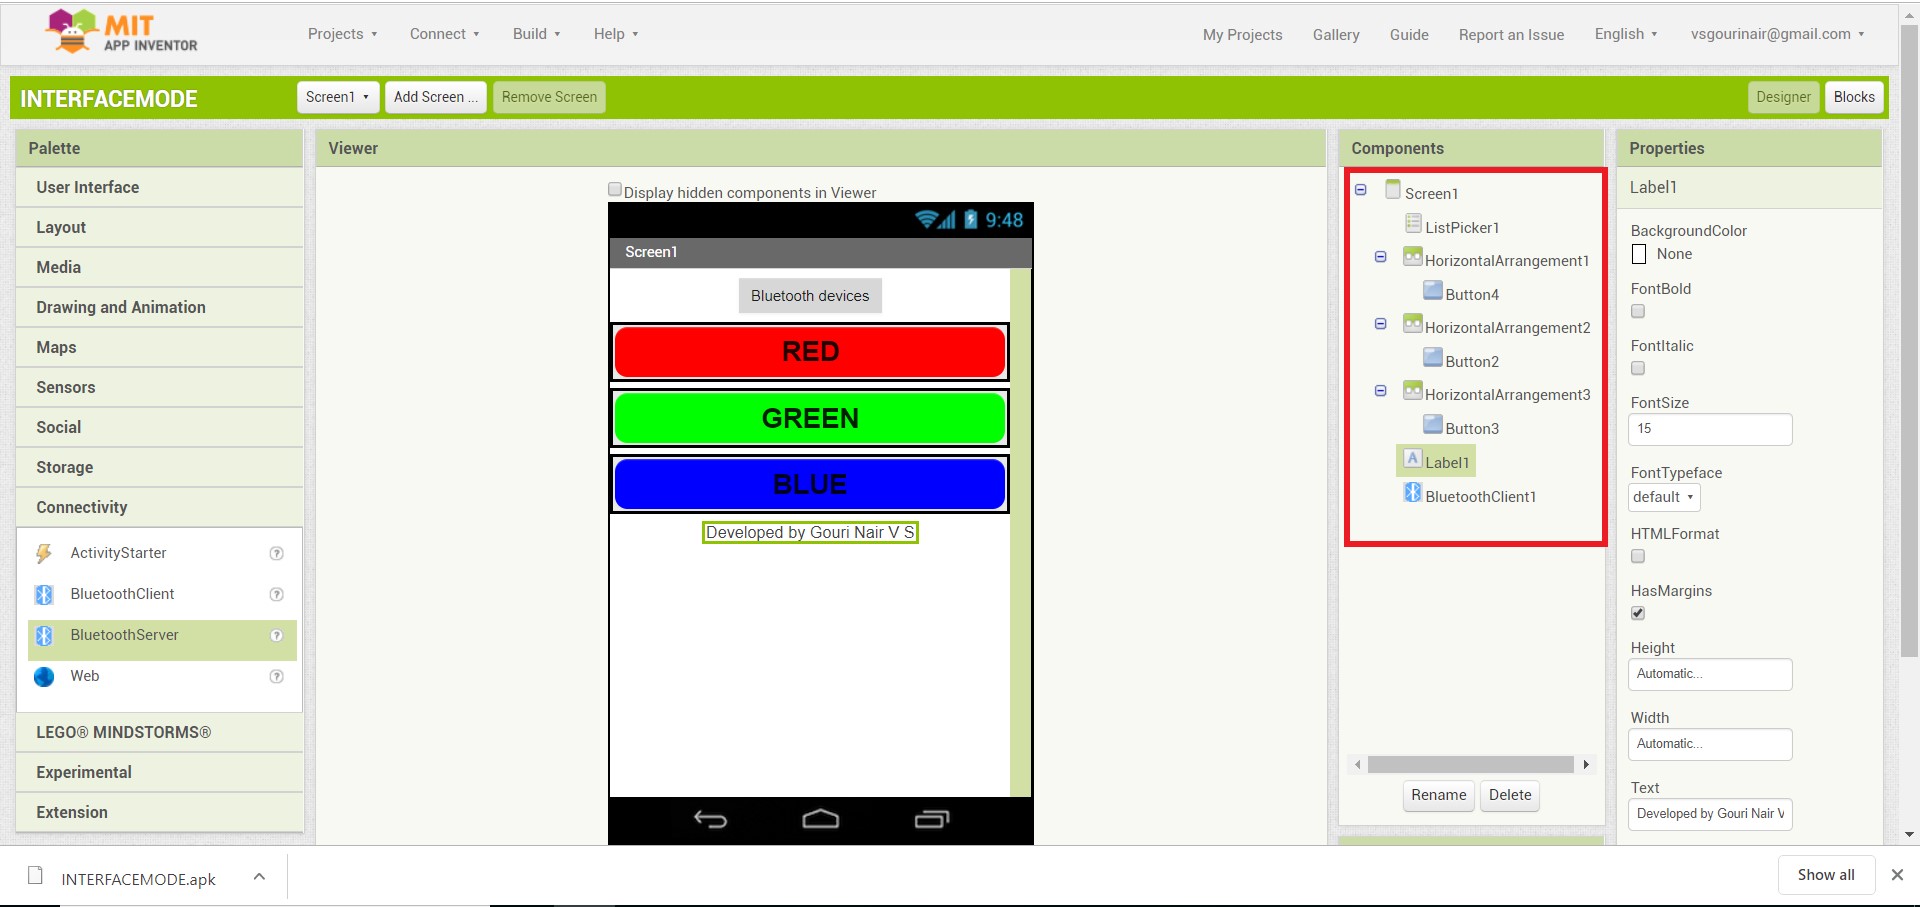
My application interface will look like this.You can see the components list that i used in the app.
Programming
Actually we don't need any coding to do our app , we just need to arrange some blocks in a order .
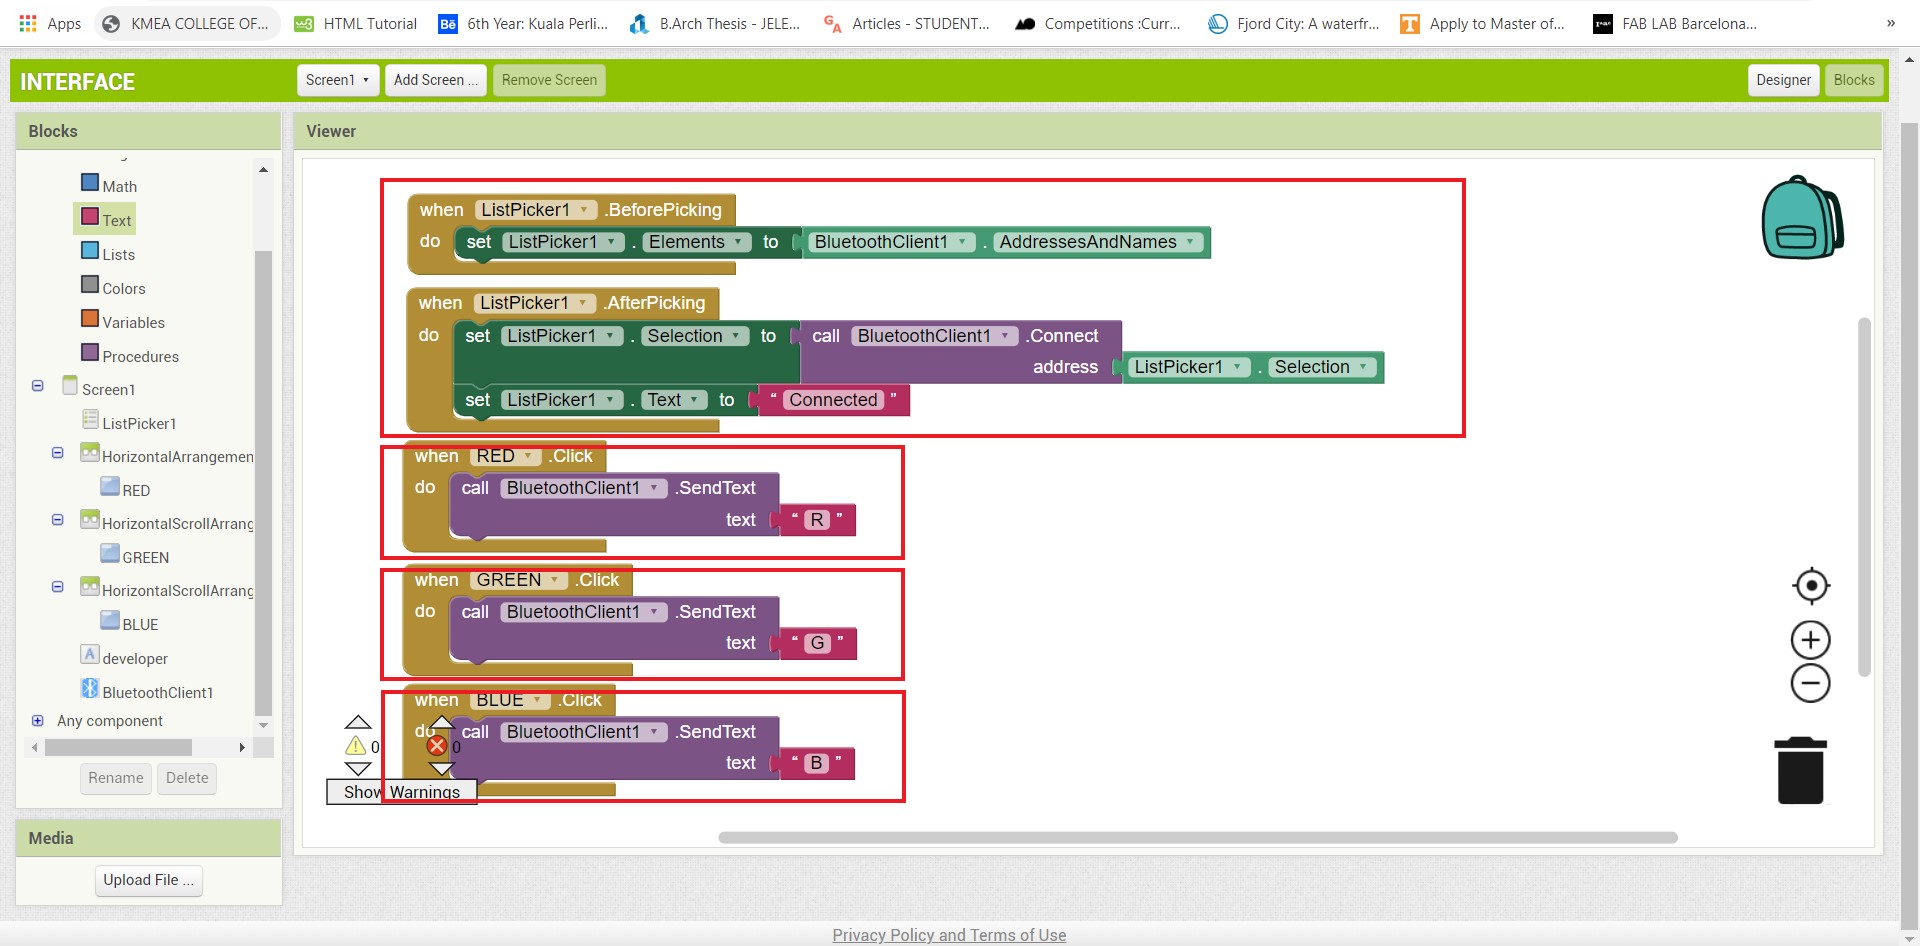
here we have main two code blocks,
Bluetooth selection
we are using ListPicker for the bluetooth selection.
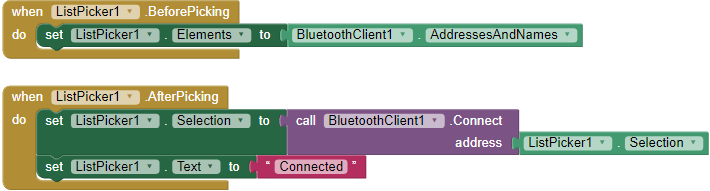
ListPicker have two state , one is BeforePicking state,in here we are loading bluetooth names in the list, second is AfterPicking here we are connecting the Bluetooth device that loaded on the ListPicker BeforePicking state , and also we are changing the text of the ListPicker in to Connected when we establish a bluetooth connection.
Button Activity
we are using two buttons for contorling LED state.
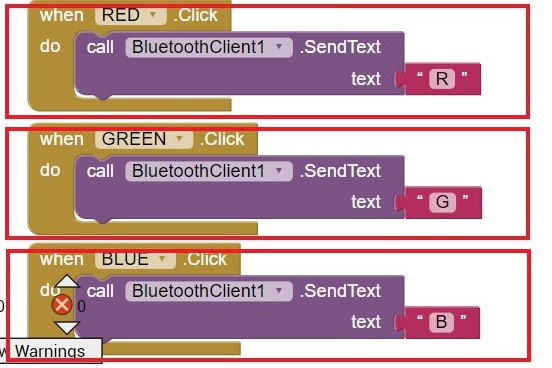
when we click a button bluetooth will transmit a text to device that connected with phone(we alredy connected a bluetooth device using ListPicker Bluetooth Selection). here if we press the Button it will transmit letter 'R' and if we press the Button 2 it will transmit letter 'G' ,if we press the Button 3 it will transmit letter 'B' that's all.
HARDWARE DEVELOPMENT
For the project i,am using re-designed Echo-Hello board that we designed in Electronics Production week , beacuse it have in-built LED.
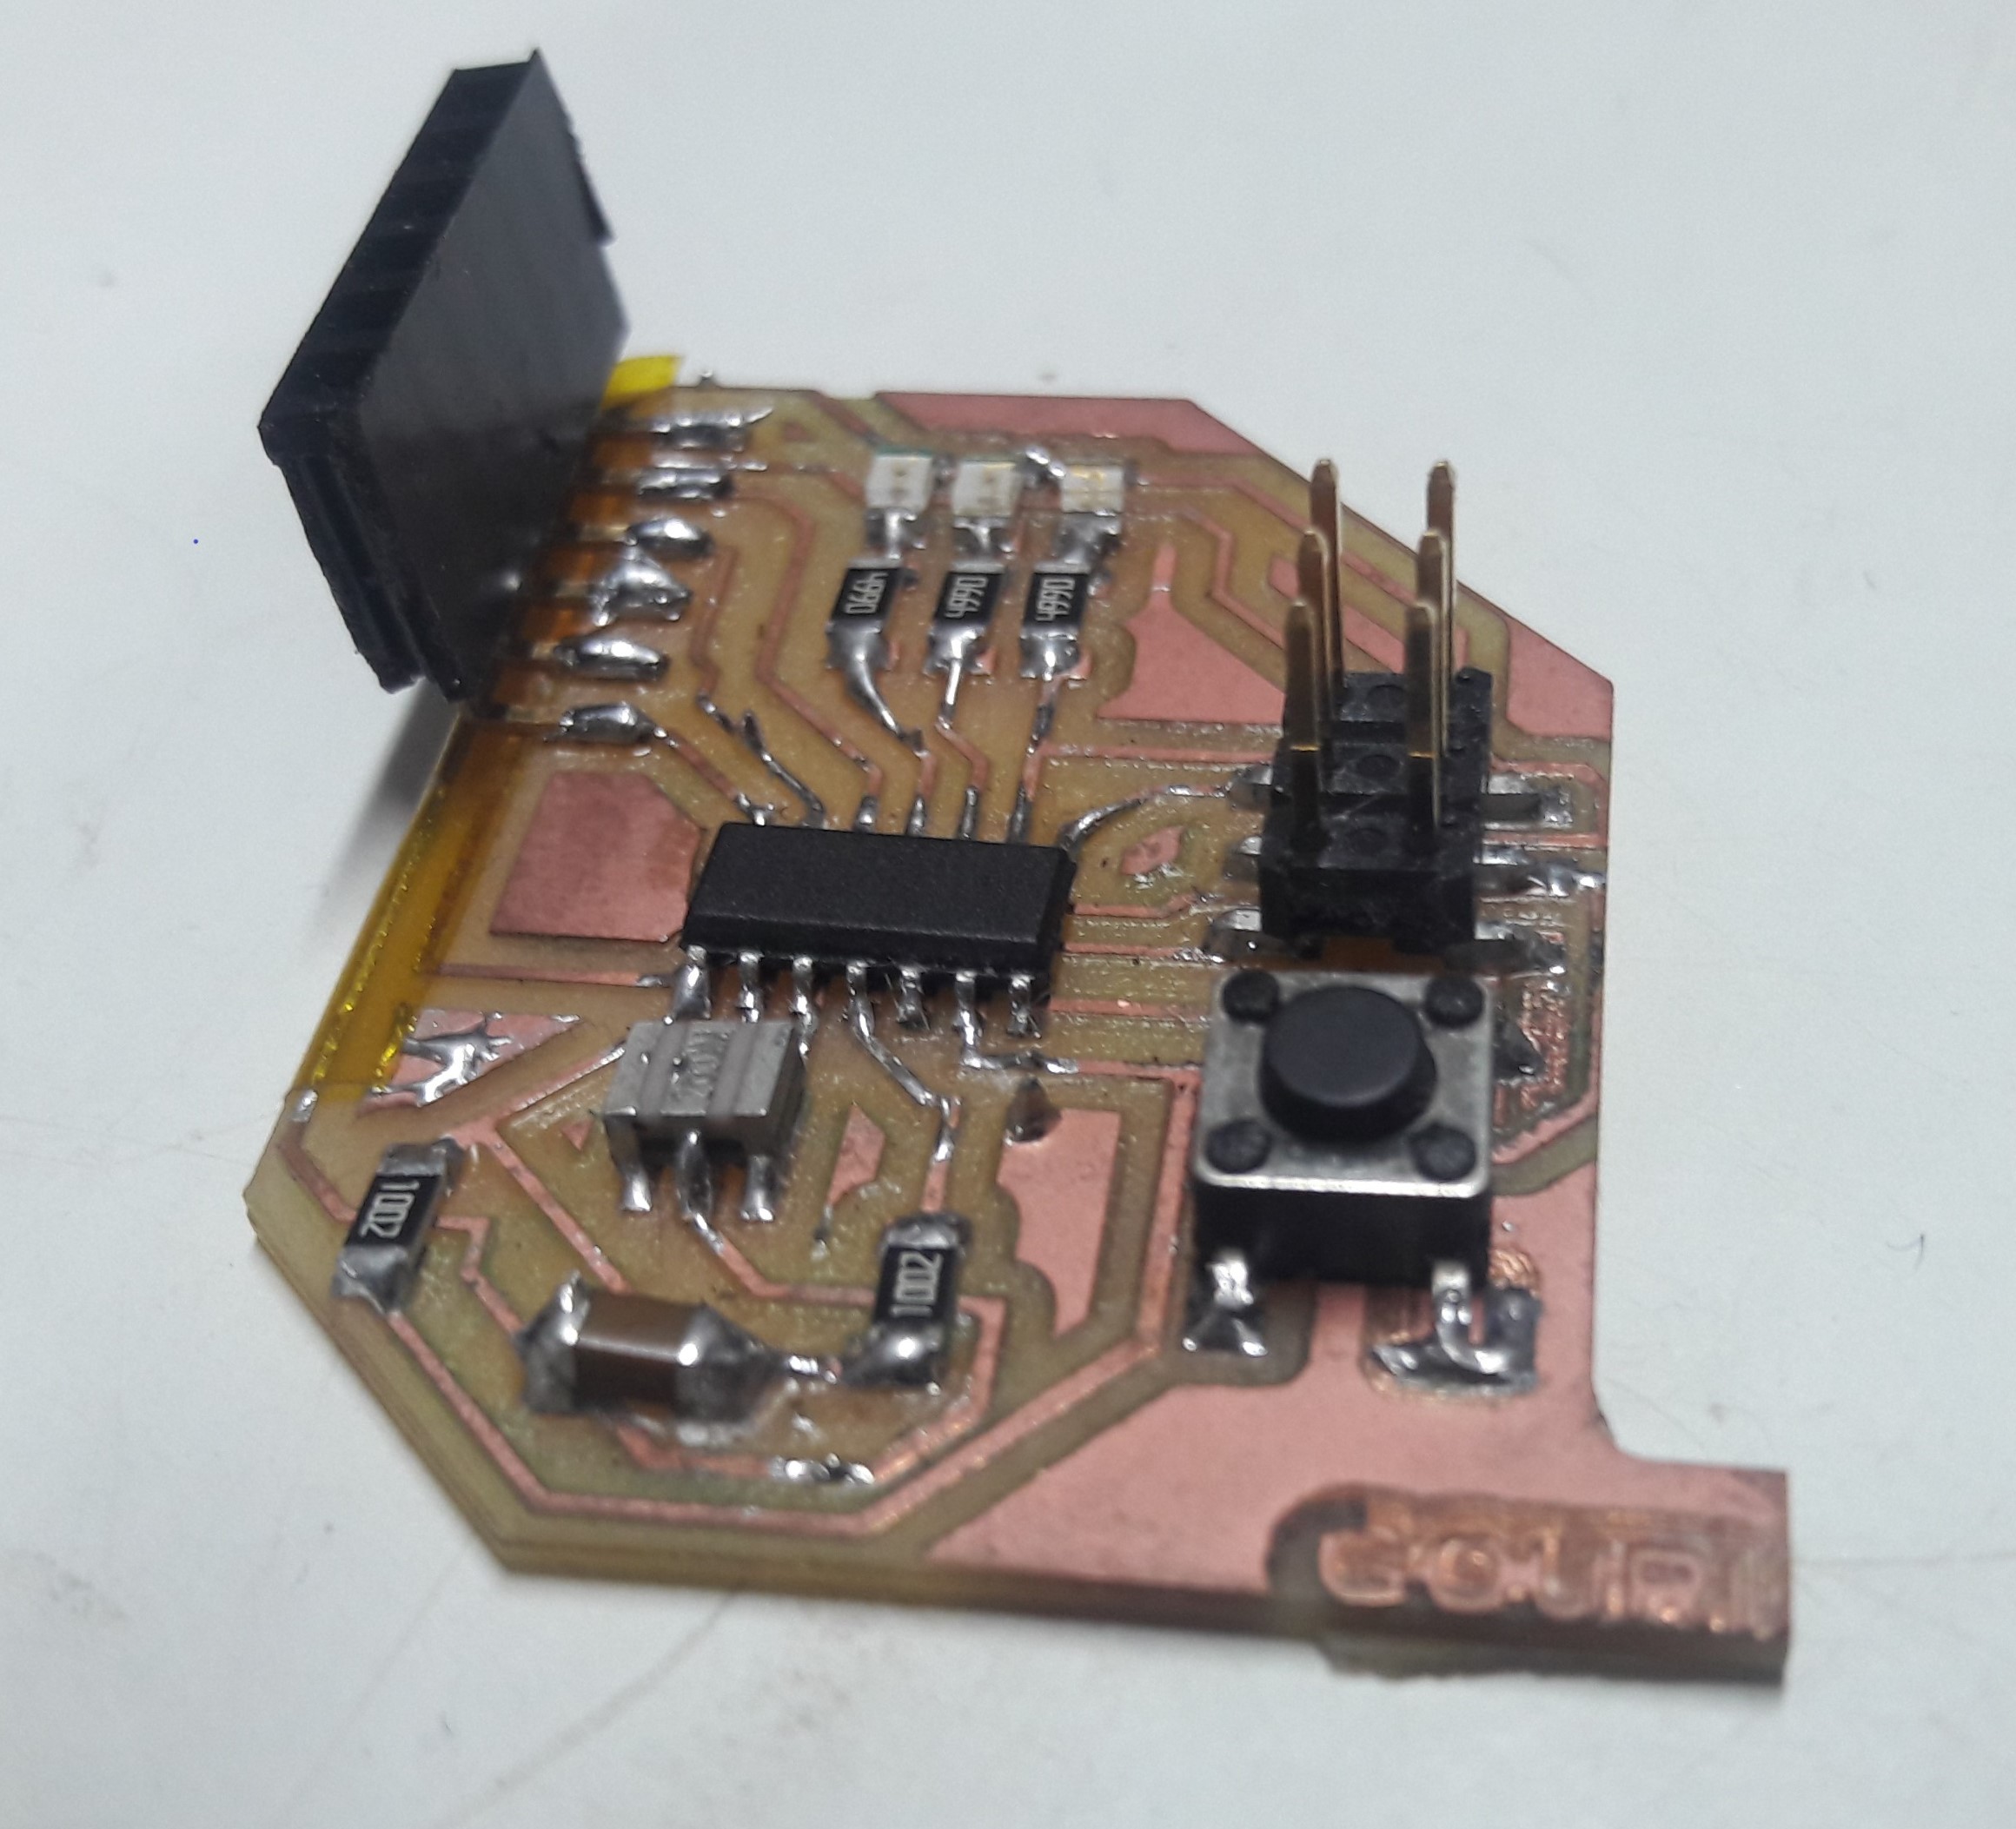
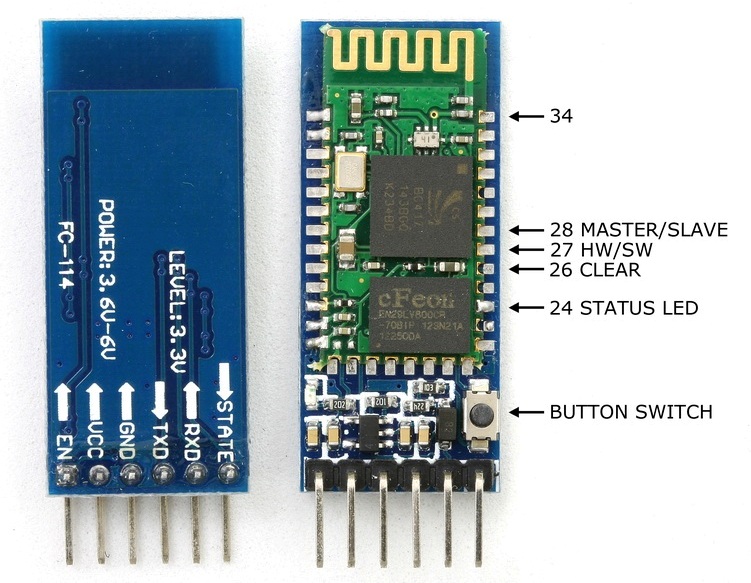
For bluetooth communication we are using HC-05 module.
Schematic Diagram
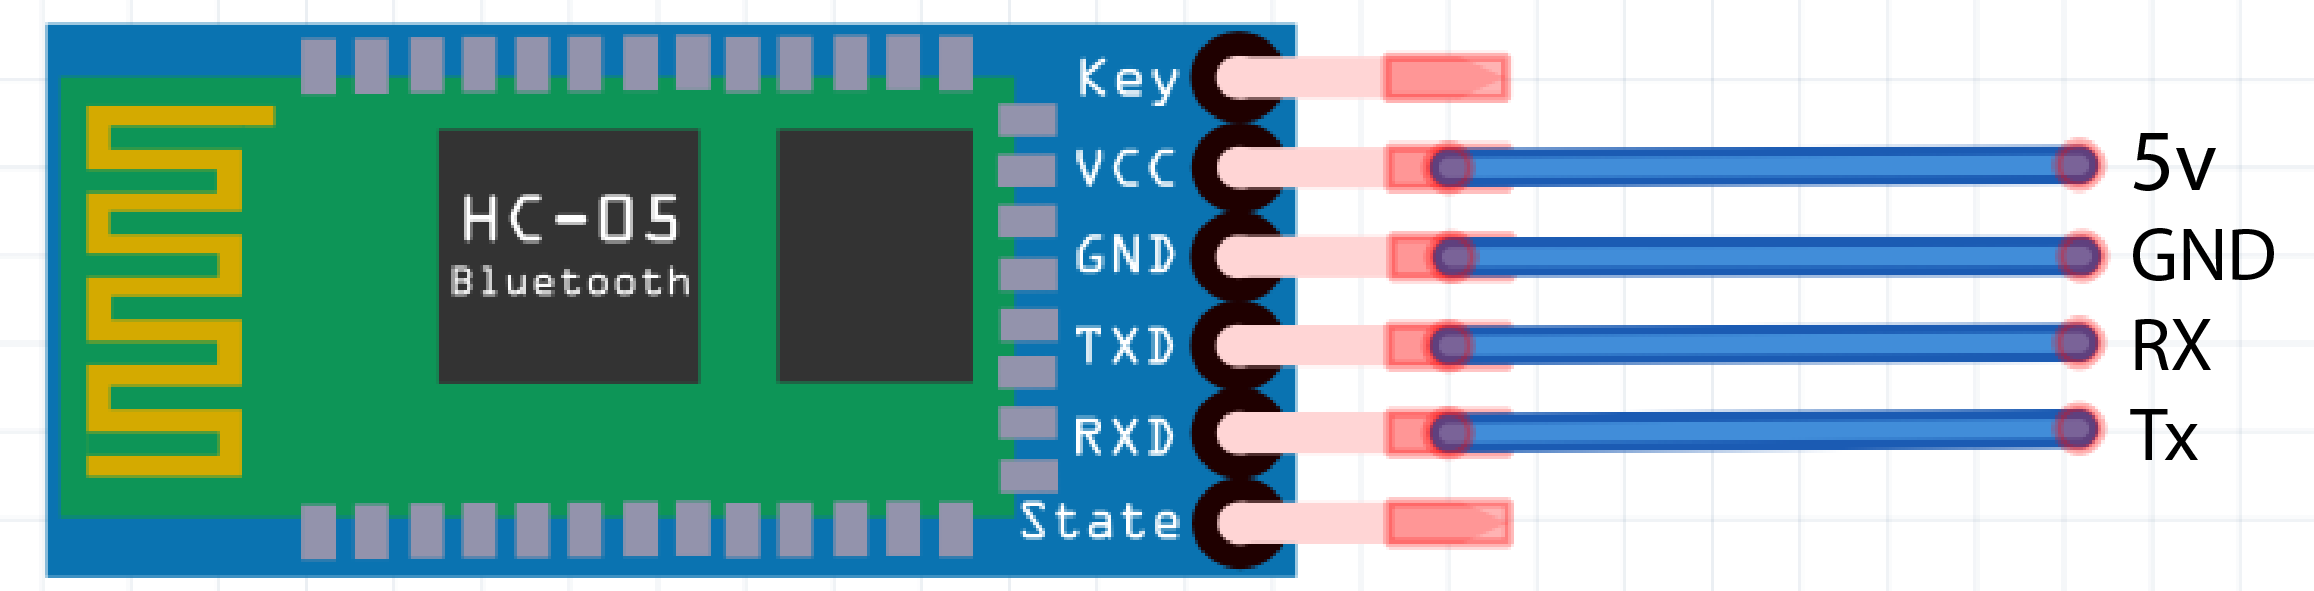
Here we are connecting blutooth VCC connect 5v , GNDconnect GND , RXD connect TX becasue The transmitter should be talking to the receiver, not to another transmitter , so the TXD connect RX .
PROGRAMMING
Code
                    #include<SoftwareSerial.h>
                    #define Rx 0
                    #define Tx 1
                    SoftwareSerial myserial(Rx, Tx);

                    char data = 0;                   //Variable for storing received data
                    void setup()
                    {
                      myserial.begin(9600);         //Sets the data rate in bits per second (baud) for serial data transmission
                      pinMode(2, OUTPUT);        //Sets digital pin 2,3,4 as output pin
                      pinMode(3, OUTPUT);
                      pinMode(4, OUTPUT);

                      digitalWrite(2, HIGH);
                      digitalWrite(3, HIGH);
                      digitalWrite(4, HIGH);
                      delay(2000);
                      digitalWrite(2, LOW);
                      digitalWrite(3, LOW);
                      digitalWrite(4, LOW);
                      delay(2000);
                    }
                    void loop()
                    {
                      if (myserial.available() > 0) // Send data only when you receive data:
                      {
                        data = myserial.read();      //Read the incoming data and store it into variable data
                        if (data == 'R')
                        { digitalWrite(2, HIGH);
                          digitalWrite(3, LOW);      //Checks whether value of data is equal to "R"
                          digitalWrite(4, LOW);
                        }

                        else if (data == 'G')
                        { digitalWrite(3, HIGH);
                          digitalWrite(2, LOW);
                          digitalWrite(4, LOW);

                        }

                        else if (data == 'B')
                        { digitalWrite(4, HIGH);
                          digitalWrite(2, LOW);
                          digitalWrite(3, LOW);
                        }

                      }
                    }
You can download the Arduino File from here.
DEMONSTRATION
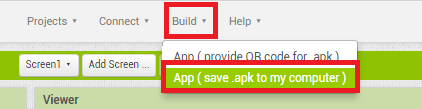
For testing first we need to install applicaion on our mobile phone , .apk file can be download by clicking Build button on the top navigavtion panel.
Download the .apk file and install it on your android phone.Next upload bluetooth progarmme to your board and connect with bluetooth module.